| 0 komentar ]

A mouthful to pronounce, but relatively simple to make, this lemon achiote grilled tofu recipe is a favorite of mine this time of year - meaning the time of year we pretend there's a real grilling season in San Francisco. All I need is a jacket (or a ten minute break in the wind and fog), and we're in business. I'll be back from South America in a few days, and wrote this up before I left, the beautiful brick-colored hue you see on the tofu comes from using achiote powder in the marinade. It gives the tofu a deep, rich, earthy flavor profile, making it a crowd-pleaser with vegetarians and non-vegetarians alike. I'll grill up a bunch of this tofu and use it as a component in rice bowls or grain salads, thinly sliced in sandwiches, or even cubed into "croutons" in soup. The marinade gets a nice tangy backbone from cayenne-spiked, freshly squeezed lemon juice, and is
rounded out with a bit of brown sugar.


Pronounced ah-chee-oh-tay, our title ingredient is available as a powder (or paste) made from ground annatto seeds. It seems like many in-the-know cooks who tire of chipotle, graduate to achiote. I use achiote powder and not the achiote paste. Two of the pastes I've found use red dye and preservatives (interesting because annatto is often used as a coloring agent). The pastes are also made with other ingredients like vinegar, and garlic, whereas the powder is simply ground annatto. Let me know if you know a brand of paste that you like that is all-natural, I haven't seen one - but to be fair, I haven't tried very hard.

Lemon Achiote Grilled Tofu Recipe

Look for achiote powder in Mexican markets.

2 tablespoons achiote powder

1/4 teaspoon cayenne pepper
1 tablespoon raw cane sugar (or brown sugar)
3 medium cloves garlic, peeled
2 big pinches of salt
1/3 cup fresh squeezed lemon juice
12 ounce package of extra firm tofu, cut into 4 slabs

Whisk together achiote powder, cayenne pepper and sugar. Sprinkle the salt over the garlic, smash it with your knife, and mince it into a paste. Add this to the achiote mixture along with the lemon juice. Whisk until combined.

Place the tofu into an 8x8 baking dish and pour the achiote marinade over the tofu - flip it, flop it....make sure you get coverage on all sides. I rub the marinade into the tofu a bit. Place in the refrigerator for at least one hour, if I remember I'll flip the tofu once or twice along the way.

Place the tofu on a medium hot grill. Brush the top of each piece of tofu with some of the leftover achiote marinade, grill until the tofu is golden on the bottom with nice grill marks (rotate the tofu 90 degrees halfway through the grilling of each side to get those nice marks). Flip, cook the other side, brush the side facing up with more leftover marinade, and cook until the bottom is golden as well. Remove and serve over a salad, on a bun with all the fixings, or any other way you can think of .

| 0 komentar ]

At this point in time, no other sandwich I make is more requested. Instead of a classic BLT sandwich, I make a TLT - tempeh, lettuce, and tomato. Not an original concept, but my secret is this...every component needs to be over-the-top flavorful. My version features chipotle-marinated tempeh alongside oven-roasted cherry tomatoes, a bit of shredded lettuce and a generous slather of avocado on a thin slice (or two) of great bread. For anyone looking for a hearty, substantial, satisfying, nutritious, and meatless lunch - it's hard to beat .

You'll need to plan ahead a bit to marinate the tempeh and roast the tomatoes, but I promise it's well worth the effort, and if you make extra you'll have sandwiches for the week. Tempeh is easy to find in most Whole Foods Markets or
natural food stores - here's a link to another favorite tempeh recipe in case you are interested in other ways of using it.


I enjoy this sandwich on a big, ultra-thin slice of whole wheat walnut bread - toasted until crisp. Now I'm thinking that miniature versions of these might be great bite-sized party food?


TLT Sandwich Recipe
I buy the Lightlife organic flax tempeh or the grain version. A bit of crumbled goat cheese might be good too.
3 tablespoons olive oil
1/4 cup shoyu sauce (or soy sauce)
2 tablespoons balsamic vinegar
2 tablespoons brown sugar (or maple syrup)
3 tablespoons adobo sauce from a can of chipotle peppers
8 ounces of tempeh, cut into 1/3-inch thick strips
1 small basket of cherry tomatoes (2 cups)
1/4 cup extra-virgin olive oil olive oil
1 tablespoon brown sugar (or maple syrup)
scant 1/2 teaspoon of salt
1 small head of romaine lettuce, cored, then cut into 1/4-inch ribbons
1-2 large avocados, mashed with a pinch of salt just before assembling
4 or 8 extra-thin slices of hearty whole grain bread, well toasted
Preheat oven to 350F degrees.
Whisk together the 3 tablespoons of olive oil, shoyu, balsamic vinegar, brown sugar and adobo sauce. Pour 1/3 of the tempeh marinade into an 8x8 baking dish (or something comparable) - you want a dish that is just big enough to hold the tempeh in a single layer - this way it will be fully enveloped by the marinade. Pour the remaining marinade over the top of the tempeh, cover and keep in the refrigerator for a couple hours, overnight or until ready to use.
While the tempeh is marinating, go ahead and roast the tomatoes. Cut each tomato in half and arrange them in a large oven-proof baking dish. Mix together the olive oil, sugar, and salt and pour this over the tomatoes. Gently toss them a bit, making sure they all get coated, finishing with each tomato facing cut-side up. Place in the oven and bake for 45 minutes or so, until the tomatoes are shrunken and sweet.
When the tempeh is done marinating heat a large pan over medium-high heat and cook the tempeh slices for a few minutes on each side. You may need to do this in batches if you don't have a big enough pan. Set the tempeh slices aside until you are ready to assemble the sandwiches.
To assemble each sandwich take one slice of bread and slather a generous layer of mashed avocado. Place a small helping of the shredded lettuce on top of the avocado, a few tomatoes, then a few slices of the tempeh, and more tomatoes. Enjoy either open faced or topped with another avocado-slathered bread slice.
Makes four sandwiches.

| 0 komentar ]

This recipe is an odd bird of sorts, but it was so well received that I thought I'd share it with you. Heather, my sister was on her way over for lunch. Wanting to avoid a trip to the store, I committed myself to throwing lunch together using whatever I had on hand. Now, I rarely combine tofu with Italian-style sauces, but this (and a few other questionable culinary moves) came into play as I reached for ingredients from both fridge and freezer. Working toward a nutritious, somewhat balanced, in-the-realm-of-healthy main course here's where I ended up. In a sentence - a skillet of quinoa, corn, chopped lacinato kale and pan-toasted tofu tossed with a big dollop of pesto and finished off with a few roasted cherry tomatoes.
I'd make it again, and I might even make it again swapping in paneer cheese for all or part of the tofu. I happened to use quinoa here, but really, you can use just about any grain you have on hand. Wayne brought home a packet of ready-to-eat brown rice from Trader Joe's the other day which would have easily worked in place of the quinoa here. You could remix this a hundred different ways depending on what grains, vegetables, and nut/seeds you have on hand. Maybe I should have titled it A Quinoa Recipe for Heather, but I think I'll make it for her again (hopefully often), so from here on out I'll think of it as Heather's Quinoa.
Safe travels home Heather, miss you. -h


Heather's Quinoa Recipe
If you don't have the time or inclination to roast cherry tomatoes, substitute some chopped, moist, sun-dried tomatoes. Also, a delicious alternative to the tofu in this recipe might be paneer cheese which can stand up to the heat without losing its form.
a splash of extra-virgin olive oil
a pinch of fine grain sea salt
1 shallot, minced
3 cups cooked quinoa* (or brown rice, or other grain)
1 cup corn, fresh or frozen
1 1/2 cups kale, spinach or other hearty green, finely chopped
2 cups extra-firm nigari tofu, browned in a skillet a bit
1/3 cup pesto
1/3 cup pumpkin seeds, toasted
1/4 cup roasted cherry tomatoes** (or chopped sun-dried tomatoes)
In a big skillet or pot heat the olive oil and salt over medium-high heat. Stir in the shallot and cook for a minute or two. Stir in the quinoa and corn and cook until hot and sizzling. Stir in the kale and then the tofu, cooking until tofu is heated through. Remove the skillet from heat and stir in the pesto and pumpkin seeds. Mix well so the pesto is spread throughout. Turn everything out onto a platter and top with the cherry tomatoes.
Serves 4 - 6.
*Rinse about 2 cups quinoa in a fine-meshed strainer. In a medium saucepan heat the quinoa and 4 cups water until boiling. Reduce heat and simmer until water is absorbed and quinoa fluffs up, about 15 minutes. Quinoa is done when you can see the curlique in each grain, and it is tender with a bit of pop to each bite. Drain any extra water and set aside.
** To roast cherry tomatoes: Heat oven to 350F degrees. Cut each tomato in half and arrange in a large oven-proof baking dish. Mix together a big splash of olive oil, a spoonful of brown sugar, and a few pinches of salt - pour this over the tomatoes. Gently toss them a bit, making sure they all get coated, finishing with each tomato facing cut-side up. Place in the oven and bake for 45 mintutes or so, until the tomatoes are shrunken and sweet.

| 0 komentar ]

People keep asking me for "that recipe...the yellow one with crunchy seeds." This particular medley made it's debut as a pre-party snack, around noon, the day of Heather's baby shower a few months back. It wasn't something I thought up ahead of time, in fact, this was something I tossed together using components that would eventually make their way out onto the baby shower spread - a scoop of this, dollop of that. It turned out to be just the sort of sun-colored goodness that can brighten up any table, particularly now, as summer has faded into fall. Made from a simple combination of yellow split peas, toasted pepitas, and cilantro pesto, it's also hard to beat as an afternoon snack.


Now, split yellow peas are a current darling of my pantry - I can't get enough of them. Healthy, filling, lovely to look at, they're great all the way around. That being said, if you don’t have the time or inclination to cook the split yellow peas from scratch (or if you are having a hard time finding them), canned white beans (or even chickpeas), well rinsed, can take their place with nice results.


Pepita Salad Recipe
You can serve the lettuce mixed in, or under the split peas depending on how you want to serve this.
1 cup pepitas, toasted (divided)
1 cup cilantro leaves and stems, well washed and lightly packed
1/3 cup Parmesan cheese, freshly grated
3 medium cloves garlic, peeled
juice of 1 medium lemon
1 serrano chile pepper, minced
2/3 cup extra-virgin olive oil
4 cups cooked yellow split peas*
2 handfuls lettuce, torn into bite-sized pieces
Make the cilantro pesto by blending 1/3 cup of the toasted pepitas, the cilantro, Parmesan cheese, garlic, lemon juice, and chile pepper with a hand blender (food processor or standard blender) until smooth. Continue blending as you gradually drizzle in the olive oil until the pesto comes together into a vibrant green sauce. Taste and add a pinch or two or salt if needed.
In a large bowl toss the yellow split peas and remaining pepitas with the pesto until everything is coated. Add the salad greens and gently toss again.
Serves 6 or so.
*To cook the dried yellow split peas bring 6 cups of water to a boil in a large saucepan, add 2 cups (rinsed) dried split yellow peas and cook for 20 -30 minutes, or until tender. Drain, salt to taste and set aside.

| 0 komentar ]

I bought a three-foot stretch of brussels sprouts the other morning at the farmers' market. For those of you who've never encountered the spectacle of brussels sprouts still on the stalk, it is something to behold. A thick, stick-straight center stalk is punctuated by tight, green brussels sprout pom-poms. It looks fantastically prehistoric. And while it doesn't fit very nicely in my market basket, once I get it home the sprouts will keep nicely this way - seemingly longer than off the stalk. I buy sprouts on the stalk whenever I can, and typically get three or four sprout-centric meals out of each, breaking off the buds as needed. In this case I combined shredded brussels sprout ribbons, apples, garlic, pine nuts, (and tofu if you like) in a skillet with a hint of maple syrup.


I know not all are brussels sprout fans, but based on some of the emails you've passed along to me, this golden-crusted brussels sprout recipe (posted last year) seems to be a well-received gateway recipe for people who thought they didn't like brussels sprouts, but really do. You could start there, and then make the jump to this recipe if you're at all apprehensive ;)...

Shredded Brussels Sprouts & Apples
Feel free to leave out the tofu if you like - I add it to make this a one skillet meal.
I used the Wildwood Organics baked savory tofu here, it browns up nicely and holds its shape - though any extra-firm tofu will work. If you don't feel like shredding the brussels sprouts, you could do a version of this recipes cutting them into quarters instead - a bit quicker as far as prepping the ingredients goes.
1 large, crisp apple, cut into bite-sized wedges
1 lemon, juice only
4 ounces extra-firm tofu cut into tiny-inch cubes (see photo)
a couple pinches of fine-grain sea salt
a couple splashes of olive oil
2 medium cloves garlic, minced
a scant tablespoon of maple syrup
1/3 cup pine nuts, toasted and chopped
12 ounces (3/4 pound). brussels sprouts, washed and cut into 1/8-inch wide ribbons
Soak the apples in a bowl filled with water and the juice of one lemon.
Cook the tofu in large hot skillet with a bit of salt and a splash of oil. Saute until golden, about 4 minutes. Stir in the garlic, wait a few seconds, now stir in the maple syrup, and cook another 30 seconds or so. Drain the apples, and add them to the skillet, cooking for another minute. Scrape the apple and tofu mixture out onto a plate and set aside while you cook the brussels sprouts.
In the same pan (no need to wash), add a touch more oil, another pinch of salt, and dial the heat up to medium-high. When the pan is nice and hot stir in the shredded brussels sprouts. Cook for 2 - 3 minutes, stirring a couple times (but not too often) until you get some golden bits, and the rest of the sprouts are bright and delicious.
Stir the apple mixture back into the skillet alongside the brussels sprouts 1/2 of the pine nuts - gently stir to combine. Remove from heat and enjoy immediately sprinkled with the remaining pine nuts. This isn't a dish you want sitting around, the flavors change dramatically after ten minutes or so, and I think that is part of the reason brussels sprouts get a bad rap. Even I don't like them after they've been sitting around.


| 0 komentar ]

This buttermilk milkshake recipe was inspired by a recent trip to Napa. My friend Pam regularly invites me on fun excursions that find me heading north from the city, across the Golden Gate, and north-east towards wine country. I won't go into too much detail about the amazing Oaxacan feast she hosted (with partner Carl) at their home/winery on a perfect day late last summer - because you will just be flat-out jealous, but I will tell you that the homemade black bean tapenade seasoned with Mexican avocado leaves (grown in Napa) being served, was one of the best bean recipes to ever pass my lips. A real treat.
Pam invited me to lunch with a couple of her amazing friends a couple weeks back at the Wine Garden in Yountville. It used to be a classic diner and has recently gone through a complete overhaul and remodel. Julie Nord, the new owner, treated us (8 total) to a delicious tasting menu. I was thrilled that they didn't even flinch when it was revealed that I was the lone vegetarian at the table - it is one thing to go to a restaurant and order a vegetarian entree, it is a whole other thing to expect a vegetarian tasting menu. Anyways, they couldn't have been more accommodating. Here is a sampling of the delicious dishes I got to try:


-a contemporary Waldorf salad - a pretty mix of greens, nuts, apples, and a slightly sweet dressing.
-Macaroni Gratin - a grown-up version of the classic, served in the cutest teeny-tiny copper pot
-Sugar Pie Pumpkin Tortelloni - tastes as good as it sounds
-String Beans with Almonds and Crispy Shallots - buttery, bright green, and perfectly cooked
-Caramelized Brussels Sprouts - best brussels sprouts I've ever had - golden, browned, crunchy where they were in contact with the pan. Yum.
-house made celery root chips
-Black Forest Cake of some sort with cocoa nibs around the edges
-and to top it all off - as if the great company, and good food weren't enough - they sent out the grand finale. The Ode to the old Diner.
We were each served a tiny buttermilk milkshake served in a small soda fountain glass. There were two flavors to choose from: vanilla with a huckleberry swirl or vanilla with an apple-cinnamon swirl. After taking a sip I was convinced that a better milkshake was not possible. The buttermilk added a bit of tang to the sweetness of the vanilla ice cream. I had the huckleberry flavor, and the way the tartness of the berries, the sweetness of the cream, and the tang of the buttermilk came together was delicious. Delicious but rich. A sip or two (or three) is really all you need to feel satisfied - drink a whole glass and it will put you right over the edge.
So of course I got home and wanted to make buttermilk shakes for everyone. We actually picked up a chrome milkshake maker at a yard sale last spring, and so, as of this afternoon, we were in business. I sent an email to Julie after our lunch, I was hoping she would ask the chef for the recipe for me - but I bounced the email (maybe a typo or something), and decided to give my own concoction a shot. I think I actually came pretty close.
You don't need a milkshake machine to make these. You can use an immersion blender, or just let your ice-cream soften up on the counter for a bit before stirring in the buttermilk. I think shot-glass sized glasses (or a tad bigger) make the perfect serving size for these (see pic). And from start to finish they only take about 5 minutes to make. A tasty, no-fuss dessert.
On a side note, another dear friend of mine (from my publishing days) who writes restaurant reviews in the Napa area wrote a nice review of the Wine Garden for the North Bay Bohemian a while back, check it out for a more non-veg take on the restaurant.


Mini Buttermilk Berry Milkshake Recipe
3 big scoops of top shelf vanilla ice cream
1/3c.-1/2c. buttermilk
A cup or so of berries
A splash of Creme de Cassis
Let me start off this recipe by saying that you can make the swirl out of just about anything. We always have berries in the freezer because Wayne loves to make smoothies every morning. Just use what ever you've got around.
Let your vanilla ice cream soften up a bit before scooping three XL scoops into a big sized glass or cup. Mix in the buttermilk using a milkshake machine, an immersion blender, or by hand. I like my milkshakes extra thick, so I don't like to over mix them or thin them out with too much liquid. If your milkshake gets too thin, just add another scoop or two of ice cream.
Make the berry puree:
Puree berries with an immersion or regular blender. Incorporate a small splash of creme de cassis.
Spoon or pour a bit of the vanilla milkshake into each serving glass, add a bit of the berry puree, more of the milkshake, more puree, and so on. Give the milkshakes a bit of a swirl with a spoon and serve immediately.
Makes enough for about 4-6, depending on serving glass size.


| 0 komentar ]

Remember last week when I asked you about drinkable chocolates? Well, I ended up getting over two hundred responses. So many responses that trying to consolidate them into a semi-coherent list has been quite a challenge. Many of you expressed interest in hearing the other responses I received. Below are the names of the drinkable chocolate products that you mentioned again and again, with a sprinkling of highlighted comments.

This is by no means intended to be the definitive post on or about drinking chocolates. I haven't even had a chance to sample all of these....yet. It is a taste of the responses you sent in. Chocolate, like wine, olives, etc, is a rich area of interest - complex, and steeped in history. My recent readings on the chocolate front include: Mort Rosenblum's Chocolate: A Bittersweet Saga of Light and Dark, The Great Book of Chocolate by David Lebovitz, La Maison du Chocolate by Robert Linxe. Also, Nigel Slater on his darkest desires (thanks Ian). Just the very tip of the iceberg.

One of the questions I still have...What is the advantage of using a drinkable chocolate product over shaving your favorite premium bar into a cup with a splash of hot milk? Convenience and less mess? The packaging on many of these products are fancy and beautiful (making for nice gifts), and many of the fancy flavor infusions are tasty...what else?

Some are confused about the difference between hot cocoa and drinking chocolates. One of my Seattle-based readers kindly offered up this well articulated explanation for the difference between cocoa and drinking chocolates:"Cocoa is derived from chocolate liquor - the professional term for unsweetened baking chocolate. Cocoa powder is chocolate liquor that has been pressed to remove half to three-quarters of its fat and then pulverized. A hydraulic press, designed by the Dutchman C. J. Van Houten in the 19th century, removes fat while leaving solids behind. Cocoa has a strong chocolate flavor and is easy to incorporate into other ingredients." Cocoa will give you difference texture, taste, and mouth feel.

Here is the list, in alphabetical order....I have a feeling the comments area on this post is going to be an absolute free for all. Enjoy, and drink in moderation ;) -h

Angelina's
Mixed reviews on the legendary Angelina's hot chocolate in/from Paris. One of my globe-trotting friends suggested that Angelina's is no longer the "it" chocolate chaud destination that it once was - and hinted that a sprinkling of others had taken its place.

J.S. exclaimed it was the best hot chocolate in the world, and F.V. emailed this Angelina experience,"...someone told me about a cafe on the Rue de Rivoli, right across from the Tuileries/Louvre called Angelina. The few people I talked with about it (locals and visitors alike) emphatically claimed they served the "best" drinking chocolate. Of course, I had to check it out for myself. It was sort of a touristy place. I wasn't able to stay to try the chocolate there, but I did buy some of their instant mix that was reported to be just as good as having it in the cafe. The mix itself was surprisingly pretty good, slightly sweeter than I like it, but notably rich and creamy for coming from a mix that you add to water (...skeptical at first, because chocolate mix plus water equals Swiss Miss without the crispy marshmallows, to me). The interesting thing about their product is that it has the milk mixed in already....seems like the finer drinking chocolates rely on fresh milk to be added to the mix. Anyway, Angelina calls their mix "granulated," if I remember correctly, as opposed to "powdered" because it actually comes in a fine pellet form, almost like chocolate sprinkles. The instructions to make it direct you to whisk the granules into hot water over a flame, then to bring it back to a boil. The bringing-it-back-to-a-boil part makes a huge difference - it makes the drink very, very creamy and frothy. I was lazy once and thought I could make the mix in the microwave, without the additional boiling, and it came out as flat as the conventional mass produced hot chocolate powders like Swiss Miss." F.V.

One more, "I know Angelina in Paris is known for their African hot chocolate and apparently, there's a cafe in downtown Napa that makes it. I couldn't bring myself to pay the $7 for it last week, otherwise, I would have tried it." L.T. Northern California

Chuao Chocolatier
"It is a powder, but with large chunks of chocolate that get so smooth and gooey. They have a version called Spicy Maya that has a great bite, but I more often turn to their plain Abula version. Because there's a little powdered milk in the mix, this is best made with water - and I use quite a generous amount of the mix (about 1/3 of whatever cup I'm drinking from)." R.N.G.

Dagoba
All organic, all natural. Dagoba seems to be a darling....lots of people wrote in citing sustainable practices and delicious products as reasons they buy. "We love his tasty chocolate drinks -all made from organic chocolate. You definitely need to try this one." B.D.

"Dagoba's Organic chocolate mixes are my favorite, very dark and rich." F.V.

Green & Black's
A little different in their approach, G&B mix chocolate with cane sugar and cocoa derived from the same beans for their mix. You said, "At first I bought the products because they were fair-trade and organic, now I buy it purely for the taste!" C.L.

Jaques Torres
Dessert Circus! Whenever that show came on PBS I was always watched - chocolate balloons, lollipops, and clown noses -oh my! Jaques offers up 2 flavors drinkable chocolate - straight, and a spiced up version that features allspice, cinnamon, ground sweet ancho chili peppers, and smoked ground chipolte chili peppers.

L.A. Burdick
Their site says pure shaved chocolate, but I'm not sure what kind of chocolate exactly. Quite a few of you listed L.A. Burdick as a favorite, citing, "rich, intense, drinking chocolate."

MarieBelle
The ladies like MarieBelle. Chalk it up to impeccably cute packaging and a tasty product. I've had the MarieBelle Aztec Hot Chocolate - their most popular flavor. It is medium dark, on the sweet side, and made with high quality Venezuelan cacao beans coming in with a cacao content of 63%. P.C. adds, "If you prepare the Aztec Hot Chocolate and chill it, it becomes pudding!"

Max Brenner
My pals down under rave about Max, the bald Israeli. He has popular chocolate cafes in Australia (and other locations?), and his hot chocolate is available for purchase online with other inventive hot chocolate products like cute little tea light heated cups with metal straws keep you chocolate melty and warm. Available for purchase here.

Mayordomo
I had a cup of Mayordomo Mexican Hot Chocolate from Oaxaca a couple weeks back and it was delicious, the problem is I forgot to ask what variety of Mayordomo was used - tablets, choco classic, canela, etc. So I am going to have to try them all. In general it seemed smoother (less gritty) and milder than the Ibarra I've tasted in the past. There is a great Mexican Chocolate Pudding recipe in Nick Malgieri's Chocolate book to try if you are a Mexican chocolate fan.

National de Chocolates (link broken)
With a higher cocoa to sugar ratio than some of the Mexican brands, many of you wrote to me about this Colombian chocolate. I haven't tried it yet, but it also seems to have some fans on this eGullet hot chocolate thread as well.

Poulain
A lone voice singing the praises of Poulain sent me the above link.

Recchiuti
Sounds like Michael may offer a drinkable chocolate product of some sort available later this year.

Scharffen Berger
No big surprise, many of you liked one of my personal hometown favorites, Scharffen Berger. Not too sweet, thick, and rich. Highly recommend trying this one.

Schokinag
Many people wrote to me recommending Schokinag. I enjoyed their 'Extreme Dark' (79%) quite a bit when I tried it at the Fancy Food Show earlier this year. I found a few of the other novelty flavors way too sweet for my tastes - especially the Dulce De Leche (not really drinkable chocolate, but part of their drinkable chocolate line nonetheless)....Give the Extreme Dark a taste. Rich, dark, smooth, all natural, GMO Free.

Valor
"I was able to keep my children moving from one historical site to another on a trip to Spain last summer by bribing them with hot chocolate stops along the way. This chocolate is unbelievably rich, velvety, and so thick, you can almost stand a spoon up in it. It has the added advantage of being relatively easy to find and very easy to make (it has both Spanish and English instructions on the label)--just heat your milk and whisk in until melted. It thickens as you let it sit off-heat for a few minutes." B.A.

"My husband and I just returned from Madrid where, as you may know, a common breakfast food is churros with chocolate. You dip the delectable churros into the thickest, most amazing hot chocolate I've ever tasted. A little bit of heaven every morning! (I'm attaching a picture, in case you're interested.) Anyway, right behind our hotel was a Valor chocolate shop, and that is where we ate every morning." J.W.

"Valor Chocolate a la Taza (in tablet form): Heated with milk (a splash of cream doesn't hurt either!) until the starch thickens it to almost spoonable consistency.

Vosges Haut Chocolat
For you infused chocolate fans. I'm not sure if this is chocolate or cocoa - they call it cocoa. T.S. says,"Outrageously expensive, but I am addicted to the Red Fire bar. This is the exquisite Red Fire in drinkable form.You can order it over the internet, so it's shippable if you don't
mind spending your kid's college tuition fund in the process."

Zingerman's

Dark Spanish drinking chocolate. I haven't tried this one yet, but lots of you mailed me raving about it.

Techniques and other information you sent:

"I had dinner with friends recently, and they pulled out their "cocomotion" hot chocolate machine. If you haven't seen it, it's like a slow-speed blender that gradually emulsifies the milk and the chocolate, heating it up to the right temperature. It takes longer than heating the milk on the stove, but I will say that it made perfectly blended, smooth-as-silk hot chocolate. I am a true believer now." A.M. - Washington D.C.

"I wanted to point you to a book you might enjoy, a chunk of which deals with chocolate in its original form. The book is called 'America's First Cuisines,' by Sophie Coe. Coe discusses the major foods and preparation techniques of the Aztecs, Maya, and Inca indigenous people. And, as I said before, she's got a great section on chocolate, full of wonderful quotes from primary sources... it's really good. And it's also very well written. I highly recommend it." D.N. - Berkeley.

"Best drinkable chocolate? Couverture. No doubt about it. Skip the 'hot chocolate mixes'. Melt couverture at no more than 80 degrees C. Stir it into a paste and keep adding water and milk (you'd be surprised, but more water than milk..just my opinion, tho). Let it rest. It becomes thicker and 'smooth' that way. I don't know if you prefer 'pure' chocolate flavor only, but sometimes chocolate tastes better with other flavors. Cayenne pepper powder can be surprisingly delish. Mint,orange etc are traditional. But there are other unusual combinations too. Lavender, wasbai, curry powder, pepper, sweet paprika, cinnamon, cardamom, cloves..you name it, it can be done." F.B.

| 0 komentar ]

One of the first things you notice as you start browsing local markets in places like Merida or Mexico City is that many of the stalls are punctuated with big, baskets overflowing with the dried maroon petals of the jamaica flower (also known as hibiscus). If nothing else on this trip, I learned how to properly pronounce jamaica - in reference to the flower, not the country. It is ha-MIKE-uh in Spanish. If store clerks are looking at you funny in the states when you ask for it, try asking for dried hibiscus. You can usually find it near the loose teas, or nestled in with bulk herbs and spices in natural food stores. I usually get mine at Rainbow Foods in San Francisco. For those of you who have more limited options in your communities you can always mail order it here or here.

Dried jamaica flowers create one of the most beautiful and delicious infusions you can imagine. In restaurants, people can't help but crane their necks as trays filled with icy tall glasses of Agua de Jamaica make their way towards lucky recipients. In the case of the jamaica flower, the flavor is as engaging as the visual. Well-chilled and served over ice, the jewel-like ruby red juice brims with the tangy sweetness of the dried petals and sugar - add a kiss of lime and you have the perfect late afternoon refresher.

Making this iced tea is easy, easy, easy. It is a must for your next BBQ or pool party - people are always delighted when they get to try anything made with jamaica flowers. Once you find a source for dried petals you are halfway there. Creating the actual tea doesn't take more than ten minutes of active cooking time, after that you are just waiting for the tea to cool.

I am sold on the taste alone, but it is also believed (in many cultures) that jamaica/hibiscus packs a bounty of healthful properties. It is rich in vitamin C, and has been widely used as an herbal method of controlling high blood pressure, tempering fevers, alleviating digestive problems, as well as improving circulatory disorders. So enjoy it on this front as well.

Other ideas: use the petals to infuse granitas, sherbets and sorbets. I've also used the petals to flavor margaritas. Popsicles! I also want to try making it into a jelly at some point.


Jamaica Flower Iced Tea Recipe
(Agua de Jamaica)

4 cups water
1/2 cup dried jamaica flowers
1/2 cup sugar (I used natural cane sugar this time around)
Another 3 cups of cold water
More sugar to taste
1 lime, thinly sliced

If you prefer, you can sweeten with any natural sweetener of your choice including honey in place of granulated sugar).

First off, pick out a pot that won't stain. Hibiscus has the potential to stain just about anything it comes in contact with including your countertop, cookware, wooden spoons, favorite jeans, etc. So keep this in mind.

Bring the 4 cups of water to a boil. Remove water from heat and add the dried flowers and sugar. Place a lid over the pot and steep for 10 minutes, stirring once or twice along the way to break down the sugar granules.

Pour the infusion through a strainer into a pitcher or jug (this is usually where something gets stained). You are going to want to add about 3 more cups of cold water to the pitcher. Taste and adjust based on your personal preference. You can add a bit more sugar if you think you need it, or more water if you feel like the jamaica is too overpowering. This is usually just about right for my taste. I don't like the sugar to overpower the refreshing natural tartness of the jamaica flower.

Cool completely and serve with plenty of ice in glasses garnished with a slice of lime.

| 0 komentar ]

This Irish Coffee recipe was inspired by a weekend trip to Lake Tahoe. Friday morning I stepped out my front door and hopped into a rented SUV. I’m used to driving a spunky, small, city car, so driving a large lumbering 4x4 is a bit of a challenge for me. Nevertheless, I pumped the beast to the brim with $60 dollars worth of unleaded and headed north-east for a weekend in the snow. Although the cabin we stayed at came fully-furnished, it didn't come with the things that make a cabin a home for the weekend. The SUV served as transport for many things required for a long (and comfortable) weekend in snow-packed Lake Tahoe. Things like:

- snow shoes I’ve had since I was 16
- my favorite skillet and metal spatula
- micro-plane grater
- sea salt
- 900 layers of clothes
- good olive oil
- trusty camera
- favorite chapstick
- cozy socks
- music
- someone to cuddle with

So, off we went - 191 miles door-to-door. Across the breadth of the Golden State, across two bridges, through the San Joaquin Valley, up, up, up the snow-capped Sierras and down into the Tahoe Basin – all under crisp, blue skies.


Emerald Bay, Lake Tahoe from the highway

A few hours after we arrived, a few of us drove around the lake to Emerald Bay. We parked the car in a lot just off the highway, and then slipped and slid our way down the mile-long, snow-packed trail to lake level where we poked around a shuttered and deserted Vikingsholm. We used to drive our boat onto the beach at Emerald Bay in the summer and tour the mansion as kids – but this is the first time I’ve visited in the winter and it has a completely different feel. You've got this big, heavy, stone house in a deep, quiet slumber waiting for warm weather and vibrant people to come later in the spring and bring it out of its deep sleep.


Hand carved font: detail of a trail map

Over the holidays I received a cute little collection of cold-weather drink recipes assembled in a tiny volume titled Some Like it Hot. It’s filled with the kind of drinks that warm you from the inside out after a long day on the slopes. I had my heart set on making their version Irish Coffee – if you’ve ever had Irish coffee you know why. You get a jolt of deep coffee flavor infused with the sugar-kissed alcohol-powered hotness of whiskey, sipped through a smooth, soothing layer of cream. Need I say more? I did a practice run before making them for my friends, but then in the flurry of activity that happens in a cabin kitchen trying to feed twelve people I somehow got distracted and forgot to make the drinks altogether. So, while my friends missed out – hopefully you won’t. This might be the best pick-me-up cold-weather apres ski drink ever. If it doesn’t look up your alley, flip through the rest of the book, there are dozens of other cozy-sounding drinks as well.


Tree graffiti from a distance


Kiss Me I’m Irish Coffee Recipe

For each drink:
2 teaspoons sugar
1 1/2 ounces Irish whiskey
2/3 cup freshly brewed strong black coffee
1 tablespoon heavy whipping cream

Combine the sugar whiskey, and coffee in an Irish coffee glass. In a small bowl, lightly whisk the cream until slightly frothy. Gently pour the cream onto the back of a spoon resting on the surface of the coffee, so that it floats on top of the coffee. Serve without stirring.

Hot hint: Getting the cream to float on top of an Irish coffee may require a little luck of the Irish. To ensure success, don’t omit the sugar, even if you don’t typically take it in your coffee, and remember not to stir in the cream, as the secret to experiencing the true flavor of an Irish coffee is sipping through the floating cream.

| 0 komentar ]

I was waiting for the perfect day to give this blackberry limeade recipe a try. Time and again, bundled in blankets on fog shrouded San Francisco afternoons, I'd whine to Wayne that we should move somewhere with a proper summer. Visions of my hand wrapped around a frosty glass of a jeweled-toned refresher like this occupied a disproportionate amount of my daydreams. No more. With temperatures roaring well past 90 degrees in San Francisco on Friday, I got my perfect summer day - and with a bit of help from Martha Hall Foose (executive chef of the Viking Cooking School), I took full advantage. The recipe is from her eloquently written new cookbook, Screen Doors and Sweet Tea: Recipes and Tales from a Southern Cook.

Blackberry Limeade Recipe

Cookbooks writers and enthusiasts listen up - Martha is a master of the head note. Hers are some of the most alluring, informative, and transporting lead-ins to recipes I've read. This one precedes the recipe for Cantaloupe Daiquiris...

The hottest I have ever been in my life was at 5:45 P.M., on August 29, 1998, on the no. 923 St. Charles Avenue streetcar in New Orleans. I had been working down in the French Quarter as a pastry chef for Susan Spicer's Bayona. Some days the unique commute felt like the scene in a movie. After rattling down the boulevards, and immediately upon entering our uptown digs, I stripped down and stood in the shower with only cold water running. I could almost hear the sizzle on contact. I really felt as if I had been braised.

The courtyards of New Orleans offer a haven from the heat. Shaded and mossy, planted with sweet-smelling Confederate Jasmine, they're like Mrs. Venable's arboretum in Suddenly Last Summer. She had her trusty secretary deliver a daiquiri every day at five. The musky sweetness of the melon, married to the brightness of the basil and mint, suspended in an icy slurry, will cool an afternoon down to the slow simmer of twilight.

I'd be willing to bet you'd like to try that recipe as well. And that's how it goes with this book - the author skillfully unveiling glimpses of her life (and love) of the South through a lovely collection of recipes.

I know many of you come to my site for inspiration on the natural foods/veg-friendly fronts, so just be aware that this isn't really that kind of book. This is Southern cookbook with all the deep-fried, shortening-packed delicacies you can imagine. Lots of meat, plenty of seafood-based recipes. That being said, there are many great ideas that are easily adaptable. For example, there's a black-eyed pea cake that (minus the bacon) looks like a fresh twist on a veggie burger, a frozen cucumber salad that sounds fascinating, and multiple rice salads that could easily be done with any number of whole grains (or whole grain rice). Plenty to be inspired by.

One of the things I loved about the blackberry limeade recipe was Martha's use of raw sugar - it lends deep, complex level of sweetness that you just don't get with white sugar. It bridges the blackberries, lime, and cardamom wonderfully.


Blackberry Limeade Recipe

Martha's recipe calls for ginger ale as the mixer (delicious!). I don't drink much soda of any sort - it's just too sweet for me, so I did a second batch with sparkling water as the mixer- great for those of you avoiding soft drinks. For some it might make sense to keep the components separate (instead of combining everything in one pitcher - making it easy to mix each drink to order. This way each person can control their own level of flavor/sweetness. Martha also includes a side bar of helpful notes related to this recipe - berries can be pulsed briefly in a food processor and strained. Be careful not to crush the seeds, as this adds a dirty taste to the blackberries. You can freeze blackberries in ice cubes for a nice accessory to the drink. The sugar syrup can be transferred to a metal mixing bowl set in a bowl of ice to cool it down quickly. For a wonderful frozen cocktail, puree ice and a jigger of gin with the blackberry-lime mixture in a blender.

4 cups fresh blackberries, or unsweetened frozen blackberries, thawed, plus extra for garnish

1 cup turbinado sugar, natural cane sugar, or grated palm sugar
1 kaffir lime leaf, crushed, or 1 tablespoon grated lime zest
1 green cardamom pod, lightly crushed
1/2 cup fresh Key lime juice (about 8 -12 limes)
Thin lime slices, for garnish
2 cups ginger ale (hs note: or sparkling water)
Ice cubes

Lay a doubled piece of cheesecloth on a nonporous work area. (As the berries will stain a wide array of cutting surfaces and clothes, this may be best done outside or over newspaper and wearing an apron or smock.) Place the blackberries on top of the cheesecloth and gather into a bundle like a hobo sack. Hold the sack of berries over a glass, stainless steel, plastic, or ceramic bowl. Twist the top of the sack to squeeze the juice from the berries into the receptacle. (This will yield about 1 cup very strong, tart, dark juice.) Refrigerate the juice until needed; discard the purple mash.

In a small saucepan, combine the sugar, 1 cup water, the lime leaf, and the cardamom pod. bring to a boil. Simmer over low heat for 10 minutes, or until the mixture is reduced to a thin syrup. Remove the lime leaf and cardamom. Allow the sugar syrup to cool and then chill it.

In a 1-quart pitcher, combine the blackberry juice, sugar syrup, and lime juice. Stir to combine and then refrigerate until cold.

To serve, stir the ginger ale (or water) into the pitcher, fill glasses with ice, and pour in the blackberry limeade. Garnish with slices of lime.

Serves 8.

Excerpted with permission from Screen Doors and Sweet Tea by Martha Hall Foose (Clarkson Potter, a division of Random House, Inc. 2008)

| 0 komentar ]

Today I'm going to try to encourage you to make your own crackers. It's not that difficult or fussy, and the results are infectiously satisfying. What kind of cracker? The cracker recipe I'm featuring today makes thin, snappy, rustic crackers. Though they are sturdy enough to stand up to a hearty dip. The technique is simple and straightforward (utilizing just a few ingredients) and the dough is a welcoming canvas to all manner of seeds, salts, cheeses, spices, or flavored oils that you might want to use as accents. The crackers are fantastically adaptable in this regard. For those of you intimidated by baking with yeast, no worries, I don't use any here.

You can make these crackers just about any shape you like. You can cut them into wide strips, thin ribbons, precise squares - or simply bake them off in big sheets. They go nicely with the artichoke dip I featured last week. I suspect they'd also be great crumbled over this Caesar salad, or diving deep into Rachel's midnight hummus over on Mighty Foods.

I'm going to list of a bunch of suggested toppings in the head notes of the recipe, but I'd love to hear your suggestions as well. Someone always comes up with a brilliant idea or approach that never would've dawned on me. I think I want to do the next batch topped with lemon zest, poppy seeds, black pepper, and Parmesan...but I suspect I could be persuaded to go a different route ;)...

Update 10/08: Lauren posted a gluten-free version of these crackers on her site.


Olive Oil Cracker Recipe

If you have trouble tracking down semolina flour, just substitute white whole wheat flour (or all-purpose flour), it will be make a slightly different cracker but should still work. To get creative with your crackers you can top them with lots of things before baking: freshly grated cheese, artisan salts, cornmeal, a dusting of your favorite spice blend, seeds, or a wash of your favorite flavored or infused oil. You can simply cut the unbaked cracker dough into various shapes using one of those pizza cutting wheels.

1 1/2 cups semolina flour
1 1/2 cups white whole wheat flour (or all-purpose flour)
1 teaspoon fine-grain sea salt
1 cup warm water
1/3 cup extra virgin olive oil

special equipment: pasta machine (optional)

Whisk together the flours and salt. Add the water and olive oil. Using a mixer with a dough hook attachment mix the dough at medium speed for about 5 - 7 minutes. Alternately, feel free to mix and then knead by hand on a floured counter-top. The dough should be just a bit tacky - not too dry, not too sticky to work with. If you need to add a bit more water (or flour) do so.

When you are done mixing, shape the dough into a large ball. Now cut into twelve equal-sized pieces. Gently rub each piece with a bit of olive oil, shape into a small ball and place on a plate. Cover with a clean dishtowel or plastic wrap and let rest at room temperature for 30 - 60 minutes.

While the dough is resting, preheat your oven to 450F degrees. Insert a pizza stone if you have one.

When the dough is done resting, flatten one dough ball. Using a rolling pin or a pasta machine, shape into a flat strip of dough - I can usually get down to the 4 setting on my pasta machine w/o trouble. Pull the dough out a bit thinner by hand (the way you might pull pizza dough). You can also cut the dough into whatever shape you like at this point. Set dough on a floured (or cornmeal dusted) baking sheet, poke each cracker with the tines of a fork to prevent puffing, add any extra toppings, and slide into the oven (onto the pizza stone). Repeat the process for the remaining dough balls, baking in small batches. If you don't have a pizza stone, bake crackers a few at a time on baking sheets. Bake until deeply golden, and let cool before eating - you will get more crackery snap.

Makes a dozen extra large crackers.

| 0 komentar ]

Back in the late 1990s, my friend Beatrice had a tradition of hosting dumpling parties. She'd make a few fillings ahead of time and then a bunch of us would spend the afternoon sitting around stuffing, folding, sealing, pinching, steaming, chatting and eventually eating. If you've never tried making your own dumplings you might consider the whole process a bit fussy, but the next time you have a bit of extra time on your hands, and/or a few nimble-fingered helpers, consider giving it a try. The filling for these particular dumplings is bright and light, focusing on the peas as the central flavor. That being said, the lemon zest is the magic ingredient that sets everything off. It permeates the pea and ricotta puree punctuating each bite like a bolt of sunshine. Dumplings are often served with a dipping sauce, but I found that all these needed were a thin drizzle of olive oil and a few grains of salt.

I'll warn you in advance, some people are natural dumpling darlings - able to crank out row after row of identical pillows. Others? Not so much. You'll quickly discover which camp you fall into. Either way, here are a few tips (I've learned the hard way) that might be helpful:

- Keep wrappers covered, they dry out quickly becoming brittle and impossible to work with.

- Exercise restraint when filling your dumplings - they key is to avoid overfilling. Also, ease out any air pockets before sealing - they expand when heated and will cause problems.

- When stuffing and folding dumplings use an assembly line method. Line counter with a dozen wrappers, drop filling onto each, seal and fold each. Instead of doing one at a time.


I cooked these two ways. You can see how the pan-fried version looks in the above shot, and they were de-licious. That being said, the steamed version were even more exceptional. The recipe below includes techniques for both.

- There are various ways cooks keep dumplings from sticking to a steamer. You might line the steamer with banana leaf, tamale leaf, or a large leaf of lettuce. I didn't have any of those on hand this time around so I kissed the back of each dumpling with a touch of olive oil (where the dumpling would touch the steamer), and hand no problem with sticking.

- You might not want to immediately steam every dumpling you make. That's ok, they freeze perfectly. To keep them from freezing together in a big clump, freeze dumplings for an hour flat on a parchment-lined baking sheet or plate. Now place them in a freezer bag. You can go straight from freezer to steamer.


Plump Pea Dumpling Recipe

Scan the notes in the original entry for more dumpling making tips, I've outlined 4 or 5 important ones there. Also, the instructions here are for steaming the dumplings, but I also had success pan-frying them in just enough olive oil to cover the bottom of the skillet. Cover and cook in a single layer until the bottoms are deeply golden, flip using a metal spatula, cover and cook until the other side is browned.

2 cups (about 10 ounces) cups peas (freshly shelled or frozen)
2/3 cup ricotta cheese
2 tablespoons olive oil
scant 1/2 tea spoon fine grain sea salt
1 small shallot, minced
1/3 cup grated Parmesan
zest of one large lemon

1 package of wonton wrappers, or round wrappers

special equipment: bamboo steamer (or see head notes for alternative cooking method)

Bring a medium saucepan of water to a boil. Salt the water (as you would pasta water) and add the peas. Cook until bright green in color and puffy, about a minute if the peas were frozen, less if you started with fresh ones.
Drain the peas and run under cold water for one minute to stop the cooking.

With a food processor (or hand blender) blend the peas, ricotta cheese, olive oil, and salt into a puree. I like a bit of texture, so I don't go too far. Return the mixture to a big bowl and stir in the shallots, Parmesan, and lemon zest. Taste. Add more salt if needed.

Fill the dumplings using an assembly line technique - a dozen at a time (for the most part following the instructions on the wrapper packaging). Place twelve wrappers out on the counter, drop a very scant teaspoon of filling onto each wrapper, rub the perimeter of each wrapper with a wet finger seal, fold (most packages have diagrams), and set aside on a plate. Do the next dozen and repeat until all the filling is used up.

Set up your steamer, rub each dumpling with a bit of olive oil, arrange the dumplings in a single layer (being careful not to overlap), and steam for about three minutes - until the dumplings are tender and transluscent. Sprinkle with a touch of salt and enjoy.

Makes about 4 dozen dumplings.

| 0 komentar ]

Apple Zucchini Crostini

Apple Zucchini Crostini Recipe

August 31, 2008

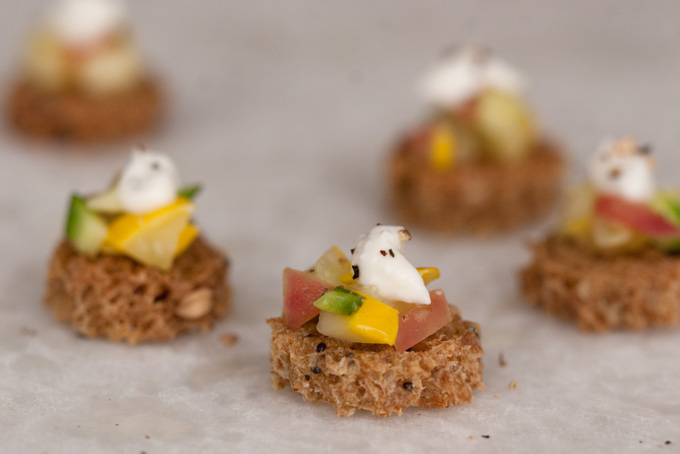
It's not everyday that you find yourself on a sun-kissed terrace in Argentina looking out at a few stray clouds dancing around the tip-tops of the Andes Mountains. It is the best kind of theater. I found myself standing, and staring, and then letting my eyes come back to close range when someone generously offered me a bite-sized treat. A small cracker topped with what looked like zucchini relish, a tiny kiss of creme fraiche, and a couple flecks of black pepper. I reached toward the platter with the hand that wasn't holding a crisp glass of Chardonnay. The crostini had a pronounced lemony tang, and the snap of the cracker played nicely with the relish-like toppings. This was the start of what amounted to a wonderful meal with both old and new friends at Bodega Ruca Malen in Luján de Cuyo.

Apple Zucchini Crostini

This version is a "broad-strokes" recreation based on my (somewhat) hazy memory, and a nearly illegible scribble in my notebook. The scribble said - cracker, zesty saute of apple and zucchini, creme fraiche, pepper. I got a third hand account of the ingredients when I was there (chef --> waiter --> friend --> me), the culinary version of telephone. I used thinned out goat cheese and in addition to that I'm sure I have other ingredients in this version that weren't in the original, and one or two that might have been in the original that escaped me. Anyhow, this version is going to be a keeper and might very well (finally) dethrone the lentil and goat cheese crostini I've done to death. The apples and zucchini paired nicely with the un-oaked Yauquen Chardonnay we were drinking, which in turn paired perfectly with the idyllic, mountain-framed sunny skies.

Apple Zucchini Crostini

Here's a photo Wayne took of me as I was waiting for a taxi to pick me up and take me to the airport. I also uploaded a little snippet of video to You Tube. Here you can see what the Andes Mountains look like just after sunrise, on a clear day, as our flight crossed from Santiago, Chile to Mendoza, Argentina. Watch it in high-quality if you can.


Apple Zucchini Crostini Recipe

Be sure to get your bread nice and toasted and assemble as close to serving time as possible. You can certainly do the components ahead of time, but the delayed assembly fend off any sogginess of the cracker. I love love the zucchini apple component, it's a late summer relish of sorts and I might even use it in another recipe I have in mind later this week. Feel free to make a larger batch of it and use it on goat cheese tacos, in salads, as an omelette topping, etc, etc. And as far as size goes - I made these a bit too small 1-inch bites would be perfect and these we just shy of that.

5-7 slices whole grain bread, very thinly sliced
3 ounces goat cheese or chevre, crumbled
tiny splash of milk or cream
splash of extra virgin olive oil
two big pinches of salt
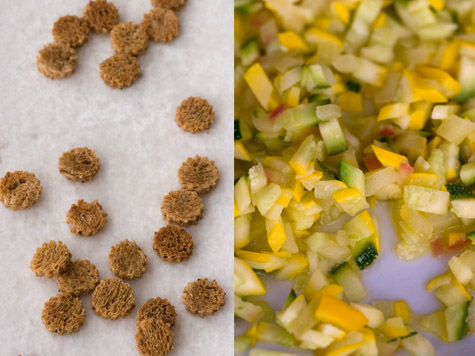
1/4 cup apple, cut into 1/4 inch dice (place in a bit of lemon water if not using immediately)
3/4 cup zucchini, cut into 1/4-inch dice
1 1/2 teaspoons lemon juice, freshly squeezed
a bit of freshly ground black pepper

Preheat oven to 350 degrees. Cut the bread into bite-sized pieces (or use a cookie cutter), brush with a bit of olive oil and sprinkle with a tiny bit of salt. Arrange in a single layer on a baking sheet and bake until golden, roughly 14 minutes, flipping once along the way. Remove and let cool.

In the meantime, whisk the goat cheese in a small bowl with just enough milk to make it fluffy, light, and easily dollop-able. Spoon into a piping bag, or alternately a small plastic bag with just a bit of the corner cut off) and set aside in a cool place.

To make the zucchini-apple component, heat a splash of olive oil in a skillet over medium high heat. Stir in the salt and the apples. Saute for about 15 seconds and then stir in the zucchini. Cook for another 15-20 seconds - things should really be sizzling. But keep in mind, you only want to heat and soften things up a touch, not turn everything to mush by overcooking. Quickly remove from the heat and stir in the lemon juice and a tiny drizzle of extra virgin olive oil. Toss and taste, add a bit more salt if needed. Transfer the zucchini mixture to a large plate to cool a bit.

To assemble take one piece of the toasted bread and spoon a small amount of the zucchini mixture on top of it. Squeeze a little bit of the goat cheese on top of that and a few flecks of black pepper. Repeat and arrange on your favorite serving platter.

Makes about 3 dozen bite-sized crostini.

| 0 komentar ]

I keep homemade crushed red pepper oil on hand to use as a simple condiment and flavor accent. I call it fire oil, and it couldn't be easier to make. Sprinkle crushed red pepper flakes in hot olive oil, let it cool, and ignore it. The flavor lights up over the next day or two, and the longer I leave it, the better. I also make hummus regularly to eat as an afternoon snack, but until now it hadn't occurred to me to combine these two favorites. So here you have it, a hummus of sorts made from pureed garbanzo beans, toasted walnuts, and spicy crushed red pepper oil. The rustic red pepper flecks and translucent olive oil are set against the creamy backdrop of the pureed beans. To finish things off, I couldn't resist a few oily, black olives and chopped cilantro - both of which I had on hand.

If you are wary of spicy foods, add the oil incrementally, or dilute it to your tastes with more olive oil before using. This is one of those recipes where you really need to do adjust to your own individual tastes. My only regret was not baking up a batch of these olive-oil crackers.


Hummus en Fuego

A couple tips before you get started - rub the skins of the walnuts off a bit after you toast them, it's nothing I really pay too much attention to for a recipe like this, but the skins can be a bit bitter and tannic. And again, make the crushed red pepper oil a day or two ahead if possible.

1/2 cup extra-virgin olive oil
1 1/2 teaspoons crushed red pepper flakes

3/4 cup walnuts, toasted
2 cups cooked (or canned) garbanzo beans, drained
1 medium clove garlic
juice of 1/2 a lemon (about 2 tablespoons)
1/2 cup hot water

1/4 cup oil-cured olives, chopped
a bit of chopped cilantro

Make the hot pepper oil a day or so ahead of time by heating the olive oil in a small saucepan for a couple minutes - until it is about as hot as you would need it to saute some onions, but not so hot that it smokes or smells acrid or burned. Turn off the heat and stir in the crushed red pepper flakes. Set aside and let cool, ideally for a day or two - to let the flavor really develop.

To make the hummus, give the walnuts a spin in the food processor, just until they are a sandy texture. Add most of the garbanzos, 1 or 2 tablespoons of the red chile oil (oil only, no flakes), garlic, and lemon juice. Now process until smooth. Drizzle in the water a bit at a time and puree more, until the hummus is creamy and billowy. I tend to let the food processor run for a minute or so at this point, it incorporates air into the puree and makes it a nice texture. Taste, adjust the seasoning - more salt, more lemon juice, etc.

Serve in a shallow bowl, drizzled with plenty of the remaining oil and red pepper flakes. I like to add any remaining garbanzo beans at this point as well as some olives and a bit of chopped cilantro for the final touch.

Makes roughly 2 1/2 cups..

| 0 komentar ]

Caramelized Onion Dip

Caramelized Onion Dip Recipe

December 6, 2008

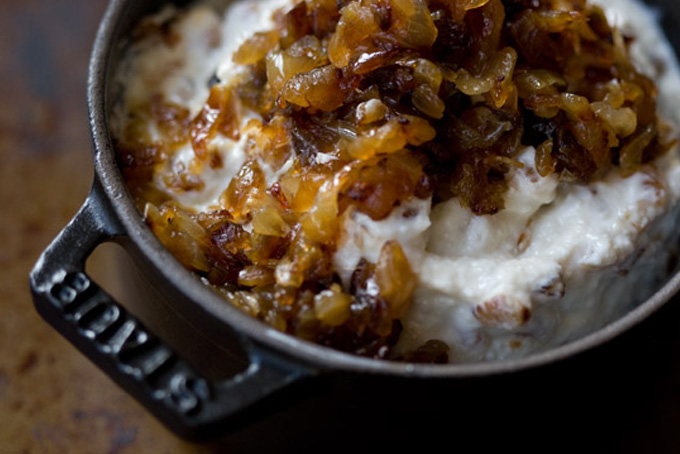
This has been at the top of my list for nearly a year, a barely legible scratch of pencil on a half-sheet of printer paper: make onion dip. In my mind the task was straight-forward - do an onion dip make-over, a version that doesn't require ripping open a packet of soup mix. As a kid my grandma would often whip up bowl of onion dip before we would visit her house. She would serve it alongside a bowl of corn chips, and I suppose this is where my taste for it developed. I decided to do a grown-up version here by using lots of deeply caramelized onions along with a Greek yogurt and sour cream base. I used dehydrated onions to give my dip that signature onion dip flavor, and to counter-balance the sweetness of the caramelized onions.


I can also imagine cutting back on the dairy (and bumping up the protein content), by pureeing some silken organic tofu in place of 1/3 to 1/2 of the sour cream/yogurt (before adding the onions). I didn't test this, but I'm almost sure it would be good.


Caramelized Onion Dip Recipe

If you have a hard time finding onion powder (not the same as onion salt), feel free to use crushed dehydrated onion flakes. Just add to taste.

2 tablespoons extra virgin olive oil
2 large yellow onions (about 1 1/2 pounds), finely chopped
3/4 cup sour cream (low-fat is fine if you like)
3/4 cup Greek yogurt (low-fat is fine if you like)
3 teaspoons dehydrated onion powder/granulates (salt-free, natural)
very scant 1/2 teaspoon salt

In a large thick-bottomed skillet over medium heat saute the chopped onions in the olive oil along with a couple pinches of salt. Stir occasionally with a wood or metal spatula and cook until the onions are deeply golden, brown, and caramelized - roughly 40 or 50 minutes (see photo). Set aside and let cool.

In the meantime, whisk together the sour cream, yogurt, onion powder, and salt. The important thing is to add whatever onion powder you are using to taste. Add a bit at a time until it tastes really good. Set aside until the caramelized onions have cooled to room temperature. Stir in 2/3 of the caramelized onions, scoop into a serving bowl, and top with the remaining onions. I think this dip is best at room temperature.

Makes about 2 cups.

| 0 komentar ]

When my mother-in-law was a little girl, her parents, both Italians, cooked beans if not every day would be every other day, in soup or in pasta. Those days they hardly afforded meat so beans became the main source of protein in their diet. Putting beans in pasta is a double-up of starch, I know it probably sounds odd to most of us. But after first tried I actually look forward to it now. Lasagnette is flat noodle cut out from lasagna sheet. You don't need to be fancy like me to make it from scratch. These home-made colored noodles I made sometimes ago had been in my freeze for too long, now it's time to get rid of them. There's no sauce but only "seasoned" oil to flavor the whole dish, so I looked for something salty with a taste of ocean. Dried scallop (found at Asian food store) tastes much more intense than the fresh one, anchovy would be a nice substitute I think. With water chestnut for some crunch, and cannellini for nourishment, this dish is totally satisfactory to me.

Recipe (yield: one-bowl meal for myself)
  • lasagnette or any flat noodle
  • 1/3 cup cooked cannellini (mine were saved from making minestrone soup the other day)
  • 3 water chestnut, diced
  • 9 small dried scallops
  • 2 big cloves of garlic, finely diced
  • a pinch of red chili pepper flakes
  • 1 Tbp lemon juice
  • olive oil
  • salt & pepper to taste
  • parsley

Direction:

  • Rinse the dried scallops, soak them in a small bowl of hot water for an hour... save the water.
  • Please plan ahead... cooking fresh pasta only take 3 minutes or so, and the saute will take 3 minutes, I want them to be done at the same time. Anyway, bring a big pot of water to boil (time to start saute), add salt and pasta, cook unit the noodles are almost done as they will be cooked a bit more in a frying pan.
  • In a skillet, drizzle a generous amount of olive oil, saute the garlic, red chili pepper and scallops over low heat for 1 - 2 minutes, raise up the heat, add cannellini, salt to taste, toss for another minute. Add in drained pasta and the scallop water if the noodles look too dry, toss. Last minute add water chestnut and lemon juice, salt and pepper to taste. Drizzle more extra virgin olive oil to serve, garnish with parsley.

I'd like to contribute this recipe to Presto Pasta Night, the event is created by Ruth at Once Upon A Feast. Please head over to her site on this Friday for the round-up.

| 0 komentar ]

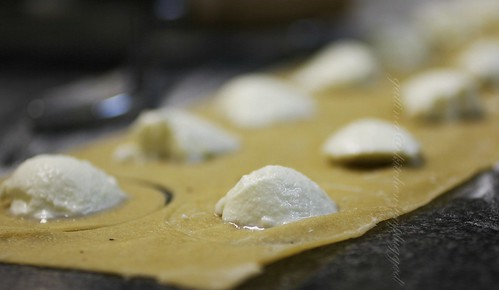
My mom has no family recipe; she's an orphan. I have no family recipe either... when I was a kid, my mom relied on making food to pay the bills; cooking was the least thing she enjoyed doing at home. But one thing she passes to me that I feel very important - eat your colors, which underlays the fact that we've been approaching food with diversity and variety. Back then each meal she prepared always included one type of meat, one seafood, and two types of vegetable. So the intake of food groups in one whole day, you do the math. For her it's a smart way to achieve a healthy diet. When I made this ravioli, I was aiming for very simple ingredients and light taste, but I still wanted variety. So I packed in two different vegetable - spinach and purple cabbage.

The amounts listed in this recipe are only estimation. Just trust your eyes and your fingers (to feel), they do the best judgement!
Recipe of spinach pasta dough
(yield: four x 20"-long dough sheets, can made about 20 ravioli)
  • 1 bag of fresh spinach leaves (I forget my size, 8 oz?... I guess)
  • 1 fresh egg
  • a good pinch of salt
  • 1 - 2 tsps oil
  • some plain flour

How-to:

  • If there's any big stem in the spinach leaves, break it away.
  • Pre-heat a skillet, saute the spinach leaves until softens, about 1 - 2 minutes. Let cool, squeeze out and discard the juice. Puree the spinach. I only used 3 tablespoons puree in this recipe.
  • Pile up one cup of flour on a work table, well combine with the egg, the spinach puree, salt and oil. You should need to keep adding some more flour until a tender dough is formed. Knead until the dough looks smooth. Rest the dough in the fridge for at least 2 hours.
  • Roll the dough through your pasta machine, in between giving your sheet enough time to rest. I stop at the second-last setting.
Recipe of green ravioli with purple cabbage & sage (yield: 2 serving as the main course)
  • home-made spinach pasta sheet, recipe see the above
  • 2 leaves of purple cabbage, finely chopped (for filling)
  • 4 leaves of purple cabbage, shredded, for tossing
  • 1 - 2 tablespoons of mild-flavored soft cheese
  • 2 tablespoons of Grana padano (Italian hard cheese)
  • a small bowl of mashed potato or grated country bread *
  • 1 shallot, diced
  • 4 slices of salami... give a bit of smoky flavor to your dish
  • about 12 sage leaves
  • a bit of butter
  • salt and black pepper

* I aimed for heavily veg-based filling, so the carb only serves the purpose of holding the mass. Please adjust according to your taste.

How-to:

To make the purple cabbage filling:

  • Pre-heat a skillet, drizzle some oil, saute the shallot over medium heat until you smell the aroma. Add (2 leaves) cabbage, saute for 3 minutes (or your preferable crispness). After it totally cools off, combine it with two cheeses, mashed potato/grated bread, salt and pepper to taste. Now you can use it to fill in the spinach ravioli.

To assemble the dish:

  • To prepare a big pot of water and bring it to boil (at the same time please start to heat up your skillet). Add a big pinch of salt in the water, boil the ravioli until it's done, 3 - 5 minutes. Drain.
  • In a hot skillet, don't add oil and fry the salami over low heat, to let the fat release. Take out the salami (and dice them), set aside.
  • Add a bit of butter if necessary, heat up the same skillet, fry the sage leaves over low heat until they look crisp, you should smell the fragrant too! Take out the sage and set aside. Saute the (4 leaves) cabbage with a good pinch of salt over medium heat for 3 minutes or your preferable crispness/softness, toss in ravioli, salt to taste. Scoop them on serving plates, sprinkle the crispy salami and sage leaves, pepper to taste. Enjoy right away.

| 0 komentar ]

There was a little shake in the comment section after I posted a recipe of basic pasta dough quite a while ago, it calls for a bit of milk.

More classic more basic, more ... controversial? Like pizza, rice or artisan bread, tender food but iron rule?

Back to that pasta recipe, in fact, it was based on one's written by an Italian lady living in Italy. Rule is meant to be broke.

So this ravioli I prepared today, may not be traditional, at least it is seasonal, my another element in enjoyable cooking.

Let's talk about how we steam the jasmine rice to wrap up. Learnt from some Chinese mothers, I mix a spoonful (mild) cooking oil into the water and grains when I have a mood for a bowl of glossy and lucious rice. Mamas sometime go wild you know :)

Any soft-ripen fresh cheese, made from goat's or cow's milk, with a tangy taste is a good choice for this recipe. Please drain the cheese very well before use, and better cook the ravioli as soon as after they're made.

Recipe of home-made ravioli

I halve this egg pasta recipe, it yields 20 - 24 ravioli, encough for 4 persons as first course, or 2 persons as substancial main course.

And I added in one tablespoon of fine samolina to give the ravioli a rustic look.

Recipe of fruit-n-herb infused butter sauce

  • 6 small green figs, not over-rippen, sliced
  • 10 red grapes, halved
  • thyme leaves from 2 spigs
  • 2 tablespoons butter
  • a good dash of fruity white wine
  • a dash of lemon juice
  • a pinch of sea salt
  • extra-virgin olive oil, with fruity aroma preferable
  • edible and organic flower as garnish

Cook the ravioli.

When the ravioli almost done, start to heat up a large skillet. Add butter, sautee the grapes over medium/ medium-low heat for 1 minute, then add figs and thyme. Raise up the heat a bit if necessary, add a good dash of wine, toss in (cook and drain) ravioli. Season it with salt and lemon juice.

Place the ravioli on a serving plate, drizzle some ev olive oil, garnish with flower. Serve immediately.

| 0 komentar ]

Does bi colore mean two colors in English? I don't know much Italian, any help is really very appreciated. Ok, back to this pasta, about the how-tos I'll explain in the bottom of my post. The yellow part is just a regular pasta while the red is beetroot's. I don't recommend using tomato as its color will wash out quite a bit after cooked. Taste-wise (dough itself), the beetroot taste isn't that noticeable, I'm very glad, not because I hate beetroot; if there's any prominant taste in pasta somehow I feel being restricted by only going for certain filling or sauce, now it leaves me no boundary.

Few years ago I saw Martha Steward shaped a candy out of a piece of pasta sheet, wouldn't it be more theme-relevant if going for a sweet filling as well? So I combined her idea with this recipe - Cialzons alla frutta (prune- and fig- filled ravioli with cinnamon-scented butter) from the book In Nonna's Kitchen. This pasta is common in Friuli, north eastern part of Italy. The book said while the choice of filling is vary from family to family, the one thing that remains constant is the filling's sweet flavor. The taste comes from the time when spice merchants called Cramars brought spices from Venice across the Carnia mountains as they made their way to Austria and Germany. The people of the area were much too poor to afford expensive spices, but they could exchange their panoply of homemade cheeses and prosciutti for some of those spices, and then invent pastas as enticing as these (extracted from In Nonna's Kitchen).` Isn't it beautiful?
So in the photo, upper left, is my version of cialzon alla frutta, instead of topped with smoked cheese as suggested, I used toasted nut and chocolate. Please note this sweet pasta is definitely a first course. It still takes me a while to get use to this idea. So at the same time, I finished up the rest of pasta dough by making two-cheese ravioli, which is on the upper right.

After I seen Martha using a manufacturer's colored pasta sheet (which consisted of three colors... as I recalled), I figured out my way to make it in a home kitchen. So far it has been tested three times, if you have tried it, or have a better idea, kindly let me know, thank you!

You will need:

  • one regular pasta dough (I used the 1st recipe)
  • and one more pasta dough, but replace the water with beetroot juice. To make the juice, I (coarsely) puree two small beetroots with 2 (or more) cups of water, pass the juice through a sieve.

Directions:

  • For Method A, it's a bit time consuming, but the outcome is better, best for small size stuff-pasta. Roll small logs of dough, stick them together by egg yolk. Here you get one basic portion.
  • For Method B, it works faster, the outcome is nice but not as good as A's, best for lasagna sheet. After you finish making the dough, shape it a big tall square block, slice them. Glue the slices (alternate color) with egg yolk, then slice the width-wise, here you get one basic portion. Keep slicing you get more.
  • Either method A or B, you have to flatten the dough with roller pin prior working with the pasta machine.
  • Pass the dough through the machine until you get your desired thickness. For stuff-pasta, I prefer the thinnest or second-last. Trim off the both ends before use.